Introduction
The front mud shields (left and right) prevent the ingress of water and dirt into the space behind the front side wings. It is evident that water and dirt will cause corrosion where in particular the bulkhead side structures are prone to rusting and repairing is a very labour (and thus cost!) intensive affair. For reference purpose, the front mud shields (or Diaphragm Assembly as Jaguar calls them) are identical for the OTS and the DHC but the FHC has different versions:
- OTS/DHC part numbers BD8401 and BD8402
- FHC part numbers BD10079 and BD10080
Where the mud shield stops at the bottom remains an opening between the lower part of the side wing and the extended door sill. Through this opening water and dirt can (over time) endanger the structural strength of the door hinges but also enter the cabin and more in particular the rear side of the trim panels left and right beneath the dashboard. This will certainly not contribute to the life of these plywood or Millboard panels, which is so often observed during a restoration. It is unclear why Jaguar left these openings exposed and opted to only partly cure the issue with the actual mud shield design, whereby so much attention was spent sealing the sides of the shield with a special rubber profile but nothing at the underside.
Mud shield extensions
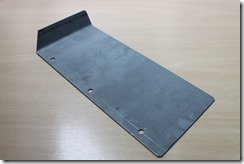
It is possible to close the opening between side wing and door sill with a simple bracket made of sheet metal. The bracket rests at one side on the lower edge of the side wing and is fixed with (e.g. 3 bolts M6 or UNF ¼”) to the horizontal flange of the sill (extension). The forward end of the bracket is bended under an angle parallel to the mud shield and positioned under that shield. Material can be aluminium, zinc plated steel or even stainless steel of a suitable gauge. The example is made of 1.2 mm zinc plated steel that will be powder coated in black for extra protection.
Please note that( probably all) Jaguar XK bodies have some difference in their dimensions, so the drawing below should be used as a guide. Every given dimension should be checked against those of a particular XK body. The drawing is for the LH side of the car; the RH side is simply mirror image. The photo below gives an impression of the RH side bracket.
Once installed the bracket looks like this (see photo below). A small (draining) gap is left between the bracket and the beginning of the door bottom.


